Hi! My name is Jessica Ostrow and I have been learning tapestry weaving on and off since the early 90s. I love color and yarn and love putting the two together! Painting with yarn? Yeah!! Paint is fun, too.. and colored pencils.. and markers.. and..and..and... I also sell yarn & knitting patterns at http://weavingrainbow.com I also have 2 other blogs at: http://weavingrainbow.com/blog http://weavingrainbow.com/HSblog
Thursday, November 14, 2013
The whole thing so far
It's a little wonky because of the way I moved the piece, but hopefully once it's off the loom (in another month? January 2014?) and blocked the straight lines will look straighter. I should have adjusted the piece before taking the picture, but was in a hurry because it was "time to go"...
Just a few more rows & I think this sampler will be finished. I want to finish weaving the egg (which was supposed to be a circle) and may attempt a smaller circle on the right side, and I think I know what I did wrong... I was being a bit of a smart-ass and thought I'd do 3 or 4 stitches at the bottom instead of the recommended 6... after it's done, I'll weave a few rows, do the header, the hem fold, a couple more rows & voila. I MAY try doing a few rows of weft interlock now that I have some clear instructions from Jan Austin's blog, I will give it a try! I did do a few weft interlocks and overall I find that slits work out pretty well fro me, but I'd like to use the weft interlock technique and get it down pat.
It's almost 12" wide by 29" wide.. not counting the woven section below the soumak fold line.
Then I'll move the piece to the back and work on something else on the new front.
My next piece will be something I think I know what design I'm going to work from, but it's kind of random... I do have some things I want to try, but I don't have a "goal" or a theme that I'll want to keep coming back to like some people do. One thing I am fascinated by is how colors & shapes can interact in tapestry...
Got a question about blogger: is there a way to do thumbnails that will embiggen in a pop up or another tab?
Monday, November 11, 2013
Butterflies & Bobbins (I'm a beginner, remember!!) and Sampler Update
Kathe Todd-Hooker posted a blog entry here discussing the pros and cons of weaving with bobbins, and also mentioned butterflies. I'll go through my thoughts point by point (but not all of Kathe's points, just the ones that stand out for me... keep in mind that I am still a beginner (advanced beginner? intermediate? adventurous beginner?) and I may (probably will) change my mind as time goes by!
1: Kathe: "Bobbins aren't a butterfly or needle"
Me: I still need to learn how to use bobbins... I find them hard and stuff and harder to handle than butterflies and maybe a little too long. if a 4" golf tee seems too long, the bigger bobbins will seem even worse... again, learning curve still in progress here.
I don't care for using needles when I weave. Long ones, short ones, doesn't matter... once in a while, they help, but most of the time, nahh. Tight spots/adjustments, yeah... back in 1998, when I was going through Nancy Harvey's exercises from her book using a small handheld paperback book sized loom (about 6" by 9"), I got frustrated because I only had one or two needles on hand & was dealing with a few different wefts.. threading and rethreading was a pain...
I had a size F crochet hook, and since I only needed "cut needlepoint lengths" for the yarn, they worked great... I still use them for my smaller looms.
I could have run to the store to get more needles, but my kids were little and at that particular moment (they were 5, 5 & 2), I didn't want to go out... I found that I really liked using a crochet hook since I only needed one.
I don't need a crochet hook on my big Crisp student loom, I use the "magic heddle" to change the shed & a shed stick to hold it open.. it's become automatic, I can use butterflies or bobbins...I never felt the need to use a crochet hook on this loom.
4: Kathe: "Bobbins keep weft cleaner"
Me: I'm sure, especially since I don't always wash my hands before coming to the loom...(I should... probably a new habit I need to form!) but don't most weavers wash and block their tapestries after taking them off the loom?
I don't think I touch every piece of the yarn on the butterflies, so don't think this is an issue.
5: Kathe: "Allows you to twist the weft bundle"
Me: This is one thing I found that I was liking (a lot!!) about the bobbins! It naturally "twists" the different colors together as the weft comes off the bobbins. I found myself occasionally giving the yarn a twist when using butterflies so that the different colors would land in different places in the woven piece. Also, since some of the yarn I have is precut (uggghhh!!!!) Paternayan yarn (hey, it was $1 for a quart sized ziplock bag & I got about 10 bags!), this twist "feature" helps to load more than 1 length of yarn onto the bobbin. It is still fiddly, but the short lengths work better with bobbins than butterflies.
6: Kathe: "Less chance of tangling."
Me: I find that I have less trouble with tangling with the butterflies than the bobbins. I sometimes forget which end the half hitch is, so I sometimes end up with a knot in the yarn.. easy enough to undo the knot, but that's a little time wasted. I need to make sure that I do the half hitch in the same place each time. Also, if I wind the yarn too close to the point, I stand a good chance of the yarn unwinding and tangling... I start higher on the golf tee than the photo below shows and I add a little more yarn to the end near the point each time I add another layer.
9: Kathe: "Less wear on the weft as great amounts are used/pulled through the sheds"
Me: When I push a butterfly into the shed, it hardly comes in contact with the warp yarns, even the fat ones & they don't stay fat very long.. they come in contact with the warp just a little bit...
Which brings me to another question: How much weft CAN you fit on various bobbins?
On the 4" golf tee, I was able to load 4-1/2 "layers" of yarn, got about 4 yards onto the it while I got about 6 yards of weft in a butterfly. Both of those had a little more yarn than I would normally put on a bobbin or butterly...this is with a worsted weight strand of Briggs & Little Softspun plus 1 strand of needlepoint tapestry yarn, so a little on the thick side. I'm using a 6 epi warp.
One length of the cut yarn covers the bobbin in 2 layers, so for areas when I need a small amount of color, this may not be too bad.
Here are photos of the butterfly & bobbin I wove to measure the above:
That butterfly is fatter than most butterflies I make but I think if I were to weave with it, I wouldn't have had much of a problem with it... I probably would have had to rewind it about halfway through because it was so big.
One disadvantage of bobbins: the cats may want to play with the dangling ones when the loom is unattended!
That's enough for now about bobbins and butterflies. At this writing, I like them both. I'll keep using the bobbins so that I can learn how to use them, and will keep using the butterflies as well. I may be a butterfly *and* bobbin girl! :)
Here's an update of my tapestry weaving progress as of this morning... there is a slight overlap between the last photo I took of "The Whole Thing So Far" on the October 19th blog entry and this. There's hatching, pick and pick, soumak (the narrow red and pink section), hatchure practice, triangle shapes, a square and a rectangle:
And here's my attempt at weaving a circle... anyone want an easter egg that looks like a setting or rising sun?
Speaking of sunsets:
1: Kathe: "Bobbins aren't a butterfly or needle"
Me: I still need to learn how to use bobbins... I find them hard and stuff and harder to handle than butterflies and maybe a little too long. if a 4" golf tee seems too long, the bigger bobbins will seem even worse... again, learning curve still in progress here.
I don't care for using needles when I weave. Long ones, short ones, doesn't matter... once in a while, they help, but most of the time, nahh. Tight spots/adjustments, yeah... back in 1998, when I was going through Nancy Harvey's exercises from her book using a small handheld paperback book sized loom (about 6" by 9"), I got frustrated because I only had one or two needles on hand & was dealing with a few different wefts.. threading and rethreading was a pain...
I had a size F crochet hook, and since I only needed "cut needlepoint lengths" for the yarn, they worked great... I still use them for my smaller looms.
I could have run to the store to get more needles, but my kids were little and at that particular moment (they were 5, 5 & 2), I didn't want to go out... I found that I really liked using a crochet hook since I only needed one.
I don't need a crochet hook on my big Crisp student loom, I use the "magic heddle" to change the shed & a shed stick to hold it open.. it's become automatic, I can use butterflies or bobbins...I never felt the need to use a crochet hook on this loom.
2: Kathe: "Bobbins organize weft bundles" (Kathe)...
Me: again, I probably just need to get better at using bobbins. I haven't had trouble with my butterflies getting tangled up (see how-to make butterfly videos by Rebecca Mezoff and Noreen Crone-Findlay (Star Trek hand sign method)), and have also found that I can fit more yarn on a butterfly than a bobbin... the bobbins I'm using are actually 4" golf tees. I can't afford "proper" bobbins at the moment, so there's that. I've had more issues with tangling with bobbins, usually when I forget which end the half hitch is, than with butterflies.
4: Kathe: "Bobbins keep weft cleaner"
Me: I'm sure, especially since I don't always wash my hands before coming to the loom...(I should... probably a new habit I need to form!) but don't most weavers wash and block their tapestries after taking them off the loom?
I don't think I touch every piece of the yarn on the butterflies, so don't think this is an issue.
5: Kathe: "Allows you to twist the weft bundle"
Me: This is one thing I found that I was liking (a lot!!) about the bobbins! It naturally "twists" the different colors together as the weft comes off the bobbins. I found myself occasionally giving the yarn a twist when using butterflies so that the different colors would land in different places in the woven piece. Also, since some of the yarn I have is precut (uggghhh!!!!) Paternayan yarn (hey, it was $1 for a quart sized ziplock bag & I got about 10 bags!), this twist "feature" helps to load more than 1 length of yarn onto the bobbin. It is still fiddly, but the short lengths work better with bobbins than butterflies.
6: Kathe: "Less chance of tangling."
Me: I find that I have less trouble with tangling with the butterflies than the bobbins. I sometimes forget which end the half hitch is, so I sometimes end up with a knot in the yarn.. easy enough to undo the knot, but that's a little time wasted. I need to make sure that I do the half hitch in the same place each time. Also, if I wind the yarn too close to the point, I stand a good chance of the yarn unwinding and tangling... I start higher on the golf tee than the photo below shows and I add a little more yarn to the end near the point each time I add another layer.
9: Kathe: "Less wear on the weft as great amounts are used/pulled through the sheds"
Me: When I push a butterfly into the shed, it hardly comes in contact with the warp yarns, even the fat ones & they don't stay fat very long.. they come in contact with the warp just a little bit...
Which brings me to another question: How much weft CAN you fit on various bobbins?
On the 4" golf tee, I was able to load 4-1/2 "layers" of yarn, got about 4 yards onto the it while I got about 6 yards of weft in a butterfly. Both of those had a little more yarn than I would normally put on a bobbin or butterly...this is with a worsted weight strand of Briggs & Little Softspun plus 1 strand of needlepoint tapestry yarn, so a little on the thick side. I'm using a 6 epi warp.
One length of the cut yarn covers the bobbin in 2 layers, so for areas when I need a small amount of color, this may not be too bad.
Here are photos of the butterfly & bobbin I wove to measure the above:
That butterfly is fatter than most butterflies I make but I think if I were to weave with it, I wouldn't have had much of a problem with it... I probably would have had to rewind it about halfway through because it was so big.
One disadvantage of bobbins: the cats may want to play with the dangling ones when the loom is unattended!
That's enough for now about bobbins and butterflies. At this writing, I like them both. I'll keep using the bobbins so that I can learn how to use them, and will keep using the butterflies as well. I may be a butterfly *and* bobbin girl! :)
Here's an update of my tapestry weaving progress as of this morning... there is a slight overlap between the last photo I took of "The Whole Thing So Far" on the October 19th blog entry and this. There's hatching, pick and pick, soumak (the narrow red and pink section), hatchure practice, triangle shapes, a square and a rectangle:
And here's my attempt at weaving a circle... anyone want an easter egg that looks like a setting or rising sun?
Speaking of sunsets:
Wednesday, October 30, 2013
this, that & the other.. or maybe just this...
I was fiddling around with the blog profile and blog title... I've changed the title 2 or 3 times.. originally I think it was Patchwork Girl Paints.. then Patchwork Girl Weaves Tapestries & Paints! Today I changed it to Patchwork Girl, Tapestry Weaver and Sometimes Painter. Maybe it should be Sunday painter since I don't dig the paints out very often. I'm more drawn to working with fibers.
I think I shall weave tonight. I was stuck on a section and have not woven in a few days, but I think that for now, I will skip that section and go back to the exercise another time. I pretty much have the hang of how to do the hatching technique, and this was an exercise in hatching and floating bars. I think the next technique is soumak. I'm looking forward to learning more soumak techniques. I only know the simplest form of it now, the form that is often used to space the warp or in the case of Rebecca Mezoff's tutorial for how to mount a tapestry, I used it in my latest tapestry for the fold of the hem.
I think I've got a couple more inches woven since the last photo, and will post another photo/group of photos later this week.
I was thinking about how I would weave more if I had more than one loom with a decent shedding system and then I thought.. hey, I could weave on the other side of the Crisp. The only possible problem would be moving the magic heddle bar & also I don't know if the other side of the loom is more or less the same as the side I'm working on. Another option would be to rotate the warp. I'll go look after I finish writing this blog entry.
The other thing is that I'm not sure what i'd weave. I have a possible cartoon and I also would like to do some free-range weaving with some ideas in mind, without a cartoon. I used to do needlepoint in a very similar style that I'm doing on the sampler, various shapes, playing with color, mixing different colors in the needlepoint thread bundle.
I ALSO have another loom that just needs to be finished being built and it would also be nice to set up a stand for it that rotates similar to how the Crisp rotates. I can put the loom frame on my lap if I want to and work semi-horizontally.
Enough rambling for now! :) Tata for now, my pretties!
I think I shall weave tonight. I was stuck on a section and have not woven in a few days, but I think that for now, I will skip that section and go back to the exercise another time. I pretty much have the hang of how to do the hatching technique, and this was an exercise in hatching and floating bars. I think the next technique is soumak. I'm looking forward to learning more soumak techniques. I only know the simplest form of it now, the form that is often used to space the warp or in the case of Rebecca Mezoff's tutorial for how to mount a tapestry, I used it in my latest tapestry for the fold of the hem.
I think I've got a couple more inches woven since the last photo, and will post another photo/group of photos later this week.
I was thinking about how I would weave more if I had more than one loom with a decent shedding system and then I thought.. hey, I could weave on the other side of the Crisp. The only possible problem would be moving the magic heddle bar & also I don't know if the other side of the loom is more or less the same as the side I'm working on. Another option would be to rotate the warp. I'll go look after I finish writing this blog entry.
The other thing is that I'm not sure what i'd weave. I have a possible cartoon and I also would like to do some free-range weaving with some ideas in mind, without a cartoon. I used to do needlepoint in a very similar style that I'm doing on the sampler, various shapes, playing with color, mixing different colors in the needlepoint thread bundle.
I ALSO have another loom that just needs to be finished being built and it would also be nice to set up a stand for it that rotates similar to how the Crisp rotates. I can put the loom frame on my lap if I want to and work semi-horizontally.
Enough rambling for now! :) Tata for now, my pretties!
Saturday, October 19, 2013
Sampler Progress: 3rd Week of October and a little painting...
Here's the latest group of photos. The first one is the latest... I had to move the tapestry so that I could get to the warp without standing up, but before I did, I moved it up so the whole thing could be seen up to last night's work:
The Whole Thing So Far:
This is what it looks like now that I rolled the tapestry towards the back of the loom:
Earlier progression:
10-10-13
10-16-13
Although I have the hang of how to do interlocks, which I tried a couple of different ways, I need a LOT more practice to get them looking good. Hatching was also a bit of a challenge, but I think part of the problem with it was the yarn color choices. The section with the white yarn came out the best because there was more contrast. I can see how using hatching with colors that don't contrast can be a valuable choice for certain effects... shading! Kathe discussed the differences between doing color progressions from top to bottom versus hatching... (see the dark to light blue block above the date card on the October 16th photo.. also the block with white and blue to blue to blue and red to red to red and white, next to the blue block..) those are different types of progressions than the hatching technique. Hatching works from side to side while the other types work from top to bottom/bottom to top..
Gary (my partner) seems minutely obsessed with the slits in the tapestry. The first time he saw the slits, he poked his finger through one of them and looked at me like "what on earth happened here??" and I told him that they're great for straight lines... today he asked if I'm going to sew them up. Heh. I told him that there are some times when an artist may not want to, but most of the time they are sewn up. There are about 8-10 in this one; I'll sew some and leave some...
Bowie, TX Art Guild Meeting:
On October 10th, I went to the local art guild meeting. Judy Braddy, an art instructor from Wichita Falls came down to talk to us and show us how much fun acrylic paints are. I already knew, and this was a chance to see that using artist's acrylic paints (which I have) are SOOO much better than the student paints. The student paints are more transparent and the pigment load is not as strong.
Here are a couple of photos from that demonstration:
Judy Brady explaining something to the group
My little flower painting... it's textured:
Sunday, October 6, 2013
Dovetails in Tapestry Weaving
It's possible that people familiar with tapestry weaving technique will understand the technical gibberish in this post. If those who are NOT familiar are able to follow all this, I'd love to know! If not, just enjoy the pictures...:)
My latest blocks of weaving are of the dovetail technique. This is where you alternate colors at each joining edge within the piece. I had a little trouble with doing dovetails properly at first, but eventually I got the hang of it and opted not to take any of the problem areas out, I just kept weaving. This is a practice tapestry, after all... learn from mistakes and keep the mistakes in so maybe I can learn from them.
Once I got the hang of how to do the dovetailing, I was able to see which yarn needed to be woven where, it's not something I could easily explain. What I did notice is that sometimes you just weave plain because the warp at the edge was down and sometimes one color gets woven in ONE space over the neighboring color & another time the OTHER color will get woven over the next. I'll do a few more rows of dovetail before moving on to interlocks and will pay attention to one or two sections to follow what is happening.
You might notice that one of the sections wasn't straight: this was kind of intentional, as I wanted to try to even the blocks out. I didn't count properly. Another thing I noticed: I was supposed to put in 6 blocks for this and the last section, but somehow managed to mess up the math so I was doing 5. No biggie.. again: practice tapestry... I noticed it when I was starting to put in the 2nd group of 5 blocks. If it was for a specific design, I would have taken out the 5 and fixed it to be 6, but if it was for something specific, I probably would have had a cartoon behind it an not have made the mistake...
At first I had trouble doing the dovetails in the right order, then I got the hang of alternating colors so one color would be on top of the other at each edge. This was something I determined based on observation. I was having a little trouble keeping track because of the wefts travelling in different directions, so observation was the key here.
Weft travelling direction:
The mustard & pink yarns are travelling in the same direction, oops. I'm still not clear why it is important for the wefts to be travelling in opposite directions from their neighbor wefts: the over/under sequence works out either way, the only hassel is if the wefts are travelling in the same direction, it's a LITTLE bit harder to see what to do without looking underneath to see which warp gets which weft... or maybe it would be easier if they were all travelling in the same direction. This is something I still need to learn.
Next up: interlocks... after that, I'll play with hatching, or maybe I'll move on so that I can learn more about soumak so that I can move on to the image I want to work on.
I think the next time I warp the Crisp loom, I may set it up so that it doesn't use a continuous warp unless I have a reason for a rotating/full warp. It would be a bit of a waste if I wanted to cut something down when there's still a lot of room to weave... we'll see how that goes!
Sampler Progress: 1st Week of October
I'm liking the latest weather and it was even COLD last night: I pulled out a second blanket. Between that and Marshmallow sitting on my butt, I was warm. Here is a photo of her sitting on Gary while he slept:
Isn't she pretty? We're pretty sure that Crookshanks is her father. Her momma is now spayed. I don't know if we'll be able to get Crookshanks neutered or not because he has gone feral. He has been seen, but has not come back into the house in several weeks, so who knows. He may have gotten spooked by something. :(
ANYWAY, I've been working on the tapestry sampler from Tapestry 101 by Kathe Todd-Hooker all week (and have been referring to my other books as well). I took pictures every day, except the one day I took off. Here they are:
The dates represent the morning I took them, the section shown was completed the night before, when photos wouldn't look so good...
More to come!
Isn't she pretty? We're pretty sure that Crookshanks is her father. Her momma is now spayed. I don't know if we'll be able to get Crookshanks neutered or not because he has gone feral. He has been seen, but has not come back into the house in several weeks, so who knows. He may have gotten spooked by something. :(
ANYWAY, I've been working on the tapestry sampler from Tapestry 101 by Kathe Todd-Hooker all week (and have been referring to my other books as well). I took pictures every day, except the one day I took off. Here they are:
| 9/29/2013 |
| 9/30/2013 |
| 10/1/2013 |
| 10/2/2013 |
| 10/4/2013 |
| 10/5/2013 |
| 10/6/2013 |
More to come!
Wine Therapist Show paintings
We STILL have not made it over to the Wine Therapist in Dallas to see our paintings, but hopefully we'll be able to get over there on Gary's next day off, maybe, HOPEFULLY tomorrow if we get the tire replaced on the car early enough for it to be worth going. Right now, we have the spare on the left front & we don't want to take that long a trip with a spare tire...
Here are our paintings:
This was Gary's first painting since he was a kid, pretty good, eh? He has some others planned, alone the same basic theme.
When we get out there, I'll post more photos from the show...
I cropped my face out of the picture because I had a weird expression on it... if you don't like it, TOUGH! I like the profile photo of me, I haven't changed that much... I'm getting better, but my heart reallly is more with tapestry weaving. More of that in newer entries as I have several photos that I want to share from the last week's progress.
Here are our paintings:
This was Gary's first painting since he was a kid, pretty good, eh? He has some others planned, alone the same basic theme.
When we get out there, I'll post more photos from the show...
I cropped my face out of the picture because I had a weird expression on it... if you don't like it, TOUGH! I like the profile photo of me, I haven't changed that much... I'm getting better, but my heart reallly is more with tapestry weaving. More of that in newer entries as I have several photos that I want to share from the last week's progress.
Saturday, September 28, 2013
sampler under way
I'm currently doing a sampler because I had trouble with some techniques when working on the last piece I wove (shown on my blog back in June, http://weavingrainbow.blogspot.com/2013/06/tapestry-weaving.html) I figured a little help with joins would be wise.. and while reading about the sampler, I had forgotten about lazy lines for large blocks of color. I'm still wondering about them, maybe under a certain size, they aren't necessary?
I'm following Kathe Todd Hooker's book, Tapestry 101 at the moment (but using butterflies because bobbins aren't in the budget & I can't find 4" golf tees locally & don't think I want to use dowels either... even Glimakra's bobbins at $3.50 each aren't in the budget at the moment... so.. butterflies.
I'm and also reading my other books about the technique. Although this can be confusing, I'm finding that reading one, then reading another helps clarify things & also once I started working on the wavy lines technique, i found it interesting that Carol Russell's instructions for the inital wavy lines selvedge was done horizontally instead of in sections as shown in Tapestry 101.
Just for grins, I may try weaving a block of solid (or semi-solid, for interest, but ONE YARN) color, weaving straight across on one of the paperback looms & using lazy lines, same yarn, same warp, same size on another piece & compare. Might not be able to see the difference in that small scale, though? I may not do this, but it's an idea...
Still no pictures, partly because the background where the loom is located is a mess right now & partly because only a little bit is done, and partly because it's a cloudy day... maybe tomorrow... maybe I'll just cover up the mess...or put a cloth behind the loom (which would show the weaving better, anyway!)
The loom calls! Ta-ta my pretties!
Monday, September 23, 2013
Since I wrote last, I picked up a Crisp tapestry loom. I have it
warped with the warp that was on it: I pulled out the 1 or 2" of weft
(acrylic, eeek!) and then I undid the warp and rolled it into 3 balls. (There were 3 knots in the warp, so I made 3 balls since I don't want to warp all the way across right now. The warp feels like some kind of
strong cotton. (It doesn't break easily when I pull with my hands.) I wonder if it is carpet warp?
Here is a photo of the loom at the seller's, I still have not taken my own photos of it:
I put on 51 or 61 strands (51 plus the edges: 3 as 1 and 2 as one, which I'm hoping will give me straight selvedges).. so far I like the loom & the tensioner is great.. the shedding device is simple & I may come up with some other shedding device for it later on, I don't know: right now, I use the "magic heddle" to create enough of a shed to stick a shed stick in, and since my loom came with 2 simple shuttles, I'm using one of them as a shed stick since I won't be using either of them to carry yarn... that's just not my way, besides I'd have to have a zillion of them: one for each color.
I haven't tried bobbins (maybe I tried them years ago, I don't remember) and it looks like I'll be using my fingers to pull the weft through the shed instead of a crochet hook, so I may learn how to wind a butterfly properly: in the past, I've had trouble keeping a butterfly from making a huge tangly mess, so maybe I WILL use bobbins, I don't know. With my smaller looms, I have been able to leave a long length of yarn like one would use for needlepoint or cross stitch, but with the bigger looms, this could be problematic, so I will see!
I won't need to use a crochet hook to pull the weft through the sheds now that I can have EITHER shed open. This is awesome for me!
I haven't decided what to weave first: I don't know if I should do a sampler to refresh some of the techniques, particularly the various interlock techniques... and weft directions... or do something more interesting than that.. or both. There's PLENTY of warp (about 7 or 8 feet since I warped the loom with a dowel in back so that I can use all of the warp).. but I doubt the warp is quality warp, and because of that I opted to use Briggs & Little Regal which is reasonably easy to get... the next warp I'll use will be a good quality, probably cotton seine twine, which I will get as soon as I can afford it.
We WILL still be finishing the copper loom: this loom may be my go-to loom, though, it's wider than the copper loom will be...
I currently have 2 paintings showing at the Wine Therapist in Dallas. One is mixed media with acrylic paint, threads, sequins and rhinestones; the other is acrylic paint on canvas. We didn't get to the opening because of Gary's work schedule: if he had been able to get out at exactly 10pm, we might have made it. We still need to get over there to see the show. Maybe next time he has a day off...
The paintings feature my character "Girl-Blob", which I came up with in the late 1970s when I was in college. I found a couple of pictures of her when browsing through my old sketchbook. I'm glad we didn't lose the storage stuff in the wildfire for sure!
No photos today (except for the Crisp loom photo) maybe next time!
Here is a photo of the loom at the seller's, I still have not taken my own photos of it:
I put on 51 or 61 strands (51 plus the edges: 3 as 1 and 2 as one, which I'm hoping will give me straight selvedges).. so far I like the loom & the tensioner is great.. the shedding device is simple & I may come up with some other shedding device for it later on, I don't know: right now, I use the "magic heddle" to create enough of a shed to stick a shed stick in, and since my loom came with 2 simple shuttles, I'm using one of them as a shed stick since I won't be using either of them to carry yarn... that's just not my way, besides I'd have to have a zillion of them: one for each color.
I haven't tried bobbins (maybe I tried them years ago, I don't remember) and it looks like I'll be using my fingers to pull the weft through the shed instead of a crochet hook, so I may learn how to wind a butterfly properly: in the past, I've had trouble keeping a butterfly from making a huge tangly mess, so maybe I WILL use bobbins, I don't know. With my smaller looms, I have been able to leave a long length of yarn like one would use for needlepoint or cross stitch, but with the bigger looms, this could be problematic, so I will see!
I won't need to use a crochet hook to pull the weft through the sheds now that I can have EITHER shed open. This is awesome for me!
I haven't decided what to weave first: I don't know if I should do a sampler to refresh some of the techniques, particularly the various interlock techniques... and weft directions... or do something more interesting than that.. or both. There's PLENTY of warp (about 7 or 8 feet since I warped the loom with a dowel in back so that I can use all of the warp).. but I doubt the warp is quality warp, and because of that I opted to use Briggs & Little Regal which is reasonably easy to get... the next warp I'll use will be a good quality, probably cotton seine twine, which I will get as soon as I can afford it.
We WILL still be finishing the copper loom: this loom may be my go-to loom, though, it's wider than the copper loom will be...
I currently have 2 paintings showing at the Wine Therapist in Dallas. One is mixed media with acrylic paint, threads, sequins and rhinestones; the other is acrylic paint on canvas. We didn't get to the opening because of Gary's work schedule: if he had been able to get out at exactly 10pm, we might have made it. We still need to get over there to see the show. Maybe next time he has a day off...
The paintings feature my character "Girl-Blob", which I came up with in the late 1970s when I was in college. I found a couple of pictures of her when browsing through my old sketchbook. I'm glad we didn't lose the storage stuff in the wildfire for sure!
No photos today (except for the Crisp loom photo) maybe next time!
Friday, September 6, 2013
Building a loom
The process of building my larger loom is going slow, but we're having to gather all the needed pieces. Today the bottom spring kits came for the 22" wide loom and the smaller 10-1/2" loom. The 8" spring kit fit perfectly in between the elbows at the top of the smaller loom:
I loosened the warp so that I could install the tray for the sping & then put a spring in and then put all the warps in place. I used the 8 dent spring. Since the loom was already warped, I didn't want to take the warp off to re-do it, so I have 2 or 3 extra warps on each side. It'll be nice not having to adjust the spacing of the warps before each weaving session!
I plan to take out the green header seen in the above (2nd) photo and doing it over so that the spacing lines up with the spring...
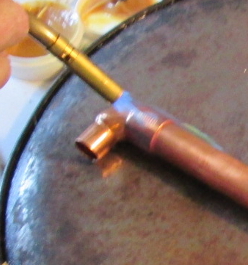
The following 2 photos show Gary using the torch to solder the elbows to the top section of the loom:
There is still more assembly to do and we need to pick up the 24" threaded rods from one of the hardware stores next week.
We've been taking care of a kitty in the park, bringing food and trying to develop trust. I don't know if it's a male or female, but s/he is cautiously friendly. The last 3 times, s/he has been sitting closer to us, but won't let us get close tnough to pet. The kitty's name is Pelham, after the park.
Off to paint...
I loosened the warp so that I could install the tray for the sping & then put a spring in and then put all the warps in place. I used the 8 dent spring. Since the loom was already warped, I didn't want to take the warp off to re-do it, so I have 2 or 3 extra warps on each side. It'll be nice not having to adjust the spacing of the warps before each weaving session!
I plan to take out the green header seen in the above (2nd) photo and doing it over so that the spacing lines up with the spring...
The following 2 photos show Gary using the torch to solder the elbows to the top section of the loom:
There is still more assembly to do and we need to pick up the 24" threaded rods from one of the hardware stores next week.
We've been taking care of a kitty in the park, bringing food and trying to develop trust. I don't know if it's a male or female, but s/he is cautiously friendly. The last 3 times, s/he has been sitting closer to us, but won't let us get close tnough to pet. The kitty's name is Pelham, after the park.
Off to paint...
Thursday, August 15, 2013
I have been doing a little bit of weaving on my tapestry looms, mostly playing & MOSTLY reading, and in the next few days, with the help of my other half, I will be building a loom that is a cross between a Mirrix loom & Archie Brennan style loom. I'm getting a Mirrix shedding device, and may be picking up the copper pipes this weekend. I may wait until the shedding device gets here, first, so I can take the clips along with me to make sure they fit. It'll be a big-ish loom, 22" wide, and I'm not sure yet how tall.
Here is a picture of one of my small looms:
Here is a picture of the back, showing how I warp so that I can rotate the warp up & down. I alternate looping the warp at the top & bottom of the bar after going around the loom:
And a closeup of it:
Next time I warp one of the smaller looms, I'll find a yarn that is easier to see for a good closeup.
I have been following Ayala's blog for over a year now & she has been blogging for 8 years! To celebrate, she is doing a giveaway:
lHere is the link to Ayala's blog
I took her basic faces class & love it: that is one of the things that she may be giving away!
Here is a picture of one of my small looms:
Here is a picture of the back, showing how I warp so that I can rotate the warp up & down. I alternate looping the warp at the top & bottom of the bar after going around the loom:
And a closeup of it:
Next time I warp one of the smaller looms, I'll find a yarn that is easier to see for a good closeup.
I have been following Ayala's blog for over a year now & she has been blogging for 8 years! To celebrate, she is doing a giveaway:
lHere is the link to Ayala's blog
I took her basic faces class & love it: that is one of the things that she may be giving away!
Wednesday, June 26, 2013
Tapestry Weaving
Well, I don't know if I should revive my Rambling Warps blog or consider tapestry weaving a part of painting, since I'm painting with yarn... doesn't matter, I'll just post it here! :)
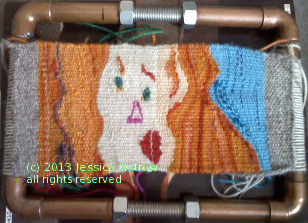
I did a postcard sized piece that I cut off the loom this morning... it's based on my Girl Blob character... I have a few drawings that I've done of her and did this piece on the loom:
The first picture is still on the loom & the 2nd one is off.
The photo is from my camera, 3 megapixels, so no enlarging or showing any details. My point and shoot camera has gone into hiding, but I plan to get another sometime soon, maybe as soon as next week.
I still have to finish securing the warp ends on the back, wash & block & hopefully it will look straighter after blocking. if not, I'll just check it up to 2 things:
1: I need to learn how to weave straighter selvedges & 2: Girl Blob is not a neat & tidy, carefully made up & dressed character, so the edges can reflect her beautiful imperfections!
I had fun with this and loved doing her hair and the water. Sometime before the week is up, I hope to do a painting of her sleeping... I have a few drawings colored with watercolor & inktense, but they will live in my sketchbook forever...
After it's blocked, I will attach a muslin backing and frame it somehow. I'm still not 100% sure how I'll frame & mount it yet, but I'll figure that out... I'm planning to hang it at the Chisholm Trail Artists Association art show on Saturday.
I did a postcard sized piece that I cut off the loom this morning... it's based on my Girl Blob character... I have a few drawings that I've done of her and did this piece on the loom:
The first picture is still on the loom & the 2nd one is off.
The photo is from my camera, 3 megapixels, so no enlarging or showing any details. My point and shoot camera has gone into hiding, but I plan to get another sometime soon, maybe as soon as next week.
I still have to finish securing the warp ends on the back, wash & block & hopefully it will look straighter after blocking. if not, I'll just check it up to 2 things:
1: I need to learn how to weave straighter selvedges & 2: Girl Blob is not a neat & tidy, carefully made up & dressed character, so the edges can reflect her beautiful imperfections!
I had fun with this and loved doing her hair and the water. Sometime before the week is up, I hope to do a painting of her sleeping... I have a few drawings colored with watercolor & inktense, but they will live in my sketchbook forever...
After it's blocked, I will attach a muslin backing and frame it somehow. I'm still not 100% sure how I'll frame & mount it yet, but I'll figure that out... I'm planning to hang it at the Chisholm Trail Artists Association art show on Saturday.
Monday, March 4, 2013
A whole bunch!
Since I'm not terribly fond of posting everyime I finish something, I'm doing the last few days in a bunch... first.. that farm painting that I mentioned in my last post... I did some more work on it & I am STILL not happy with it... not sure what direction to take it in at this point, but will probably let it sit for a while.. I'd like to figure out some way to make it more playful. I like what I did with the road.. and the trees. Maybe I could work some bricking into the leftmost building. The horse is something a baby could have done. Here's 3 pictures of it: the reference photo, the first draft from last week & the latest edition of it:
Suggestions welcome, I think... or maybe I just need to keep on painting & eventually I'll just get better. Maybe I'll come back to this or maybe I'll gesso it and paint over it.
I did 3 pictures from the book that I did the horse from. A couple of people thought that the horse was paint by number! I'm not sure what to think of that, haha, but I sure hope that once I get better, my style won't LOOK paint by number-ish! This is the link to the book:
Foster Book 305 Acrylic: Animals
The one of Indy is my 3 year old dog. It's my interpretation of the puppy (except I ended up not following the instructions in the book, just did it "my way"). We found Indy on the side of the road near where we were living 3 years ago on July 4th, 2010. He was pretty ill, anemic from hookworms & needed a blood transfusion or else he would not be here today. He was also tiny for the age the vet thought based on his teeth.. every time we went to see her, he was "older" than the last time... so here we had a 5 month old (possibly pure German Shepherd) weighing 11 pounds? WTF??? Once he started feeling better, he gained pretty quickly, and now weighs around 50 pounds, but his growth was badly stunted. The vet thinks he may have some blue heeler in him, but a lot of folks now think he's a German Shepherd. Anyway, he's sweet, happy & occasionally hyper... Here's the reference photo and painting: the eyes could use a little work. I'll come back to that another time since I want to practice painting a bit...also need some burnt umber, have been making brown, but I think umber would do the trick.
BTW, I did not use black paint to make his black fur... I'm happy about that!
The next two are an experiment: the first one is acrylic on watercolor paper and the other is acrylic on MDF board. That was the first time I've done acrylic on watercolor paper. Fun!:
I got the next one out of this book
Suggestions welcome, I think... or maybe I just need to keep on painting & eventually I'll just get better. Maybe I'll come back to this or maybe I'll gesso it and paint over it.
I did 3 pictures from the book that I did the horse from. A couple of people thought that the horse was paint by number! I'm not sure what to think of that, haha, but I sure hope that once I get better, my style won't LOOK paint by number-ish! This is the link to the book:
Foster Book 305 Acrylic: Animals
The one of Indy is my 3 year old dog. It's my interpretation of the puppy (except I ended up not following the instructions in the book, just did it "my way"). We found Indy on the side of the road near where we were living 3 years ago on July 4th, 2010. He was pretty ill, anemic from hookworms & needed a blood transfusion or else he would not be here today. He was also tiny for the age the vet thought based on his teeth.. every time we went to see her, he was "older" than the last time... so here we had a 5 month old (possibly pure German Shepherd) weighing 11 pounds? WTF??? Once he started feeling better, he gained pretty quickly, and now weighs around 50 pounds, but his growth was badly stunted. The vet thinks he may have some blue heeler in him, but a lot of folks now think he's a German Shepherd. Anyway, he's sweet, happy & occasionally hyper... Here's the reference photo and painting: the eyes could use a little work. I'll come back to that another time since I want to practice painting a bit...also need some burnt umber, have been making brown, but I think umber would do the trick.
BTW, I did not use black paint to make his black fur... I'm happy about that!
The next two are an experiment: the first one is acrylic on watercolor paper and the other is acrylic on MDF board. That was the first time I've done acrylic on watercolor paper. Fun!:
I got the next one out of this book
Wednesday, February 27, 2013
10 day painting challenge with Jane Spakowsky on Facebook
About 6 days ago, Jane (also known as "Gritty Jane") set up a challenge on Facebook to do a painting a day for 10 days.
Many people in the challenge are up to Day 5 or 6 now, but I finally got started. Today I decided to work from a Step By Step Animals (acrylic) tutorial book that I have. It's supposed to be realistic, but I think I ended up with something a little more impressionistic. Here's the first step:
Here is the latest version.. I'm probably done with it:
Earlier today, I did another painting but I need to let it sit for a bit and see if I want to do more with it. I won't show it right now. It was an experiment in my Rte 101 Bowie to Sunset (with possible side trips) project.
I don't know if I'll enter the earlier painting in the 10 day challenge as I'd like the challenge to be a sort of "learn to paint" thing for me, or rather a way to get a better idea of what I'm doing and see what direction I'd like to go.
I'm not sure what style is "me" yet and don't know if I want to go back to my old abstract style from the early 80s... I'm drawn to folk art/whimsy, as well as a lot of other styles, mostly expression-representative.. the horse portrait above was meant to be realistic, but it was not the first project in the book, so maybe I wasn't building up skills. The reason I picked that one to paint is because the picture I did earlier has a horse in it & the horse doesn't look very good, looks like an afterthought. One of the other problems with this morning's picture is it has a lot of foreground... just need to think about it a little bit! I may just need to do it over differently.
Many people in the challenge are up to Day 5 or 6 now, but I finally got started. Today I decided to work from a Step By Step Animals (acrylic) tutorial book that I have. It's supposed to be realistic, but I think I ended up with something a little more impressionistic. Here's the first step:
Here is the latest version.. I'm probably done with it:
Earlier today, I did another painting but I need to let it sit for a bit and see if I want to do more with it. I won't show it right now. It was an experiment in my Rte 101 Bowie to Sunset (with possible side trips) project.
I don't know if I'll enter the earlier painting in the 10 day challenge as I'd like the challenge to be a sort of "learn to paint" thing for me, or rather a way to get a better idea of what I'm doing and see what direction I'd like to go.
I'm not sure what style is "me" yet and don't know if I want to go back to my old abstract style from the early 80s... I'm drawn to folk art/whimsy, as well as a lot of other styles, mostly expression-representative.. the horse portrait above was meant to be realistic, but it was not the first project in the book, so maybe I wasn't building up skills. The reason I picked that one to paint is because the picture I did earlier has a horse in it & the horse doesn't look very good, looks like an afterthought. One of the other problems with this morning's picture is it has a lot of foreground... just need to think about it a little bit! I may just need to do it over differently.
Friday, January 11, 2013
First painting of 2013, not finished
Here's the first painting I did this year, it's not finished & the painting is now different from how it looks here.. and not necessarily for the better. I don't know if I'll keep working on it or not. I kind of muddied up the rock shed when I did some more work on it, but I may play with it. I've a *long* way to go yet!
The photo quality is poor, but I used my phone camera in iffy lighting. But I'm okay with that because it's an image that's less likely to get stolen! Without further ado:
The Rock Shed & Emma's Resting Place:
Yesterday I did a couple of drawings outside...
I want to play with different subjects, leaning on landscape/townscapes & come up with a style that I'm happy with.. and I'd also like to be able to do something that might make one wonder if it's a photograph or painting.. just to be able to do it, not as my style... :)
The photo quality is poor, but I used my phone camera in iffy lighting. But I'm okay with that because it's an image that's less likely to get stolen! Without further ado:
The Rock Shed & Emma's Resting Place:
This is done in acrylic, heavy body...
I'm somewhat obsessed with getting this a bit right-er, but what I'll probably do is try a few small studies & maybe come back to this subject and will probably do a bit more on this board.
The other day, I was at Home Depot and I picked up a framing blade for our table saw so that I could cut up the MDF board pieces to smaller sizes...
Yesterday I did a couple of drawings outside...
I want to play with different subjects, leaning on landscape/townscapes & come up with a style that I'm happy with.. and I'd also like to be able to do something that might make one wonder if it's a photograph or painting.. just to be able to do it, not as my style... :)
Saturday, January 5, 2013
Scratch the 30 paintings in 30 days for this month... I need to do some exercises and learn some painting techniques... maybe I can do a 30x30 another time! Will stick with Piece A Week, though...
What happened was I did a drawing a couple of days ago & then ruined the drawing by labelling the stones with letters to designate which would be lighter & which would be darker, otherwise it might have been a decent drawing! It was of our rock shed with some Wannabe Trees around it... the painting looks okay from a distance but horrid up close... not sure if I'll take a picture or not.
The other issue I have is most of the masonite panels I have are too big. I think I have some more someplace, but I'm not sure where at the moment. Sometime in the next couple of days I'll go get another piece & have it cut up into sizes like 9x12 and 8x10 and maybe square and maybe 6x8 but no bigger than 12x12...
That's that for now!
What happened was I did a drawing a couple of days ago & then ruined the drawing by labelling the stones with letters to designate which would be lighter & which would be darker, otherwise it might have been a decent drawing! It was of our rock shed with some Wannabe Trees around it... the painting looks okay from a distance but horrid up close... not sure if I'll take a picture or not.
The other issue I have is most of the masonite panels I have are too big. I think I have some more someplace, but I'm not sure where at the moment. Sometime in the next couple of days I'll go get another piece & have it cut up into sizes like 9x12 and 8x10 and maybe square and maybe 6x8 but no bigger than 12x12...
That's that for now!
Wednesday, January 2, 2013
Happy New Year, everyone!
I don't do resolutions but have found 2 challenges that I'd like to do: is Piece A Week, which is a private Facebook group. If you're interested in joining, post a comment & I'll let you know more about it.
The other one is a painting a day for 30 days also known as 30x30...
I reserve the right to not complete all 30 days this month (or ever), but I'll try.
For starters, since I don't know what I want to paint or what size I want to paint, I'll try different sizes of MDF board that I have, and I've got several pieces in several different sizes... I'll be painting with Liquitex Heavy Body acrylic (from a 12 tube set) and will mostly be using palette knives and may do some Inktense, watercolor or colored pencil paintings... here is a picture of my paintbox:
It's messy, I use a folding table for an "easel" and I tossed a few paintbrushes, pallette knives & one possibility for a color mixing pallete.
I don't know yet what I'm going to paint for subjects, but I'll try different things and go from there...
As far as posting, I'll probably post twice a week...
To see other stuff I've done, check out my regular blog particularly April & May 2012...
Let the madness begin!
I don't do resolutions but have found 2 challenges that I'd like to do: is Piece A Week, which is a private Facebook group. If you're interested in joining, post a comment & I'll let you know more about it.
The other one is a painting a day for 30 days also known as 30x30...
I reserve the right to not complete all 30 days this month (or ever), but I'll try.
For starters, since I don't know what I want to paint or what size I want to paint, I'll try different sizes of MDF board that I have, and I've got several pieces in several different sizes... I'll be painting with Liquitex Heavy Body acrylic (from a 12 tube set) and will mostly be using palette knives and may do some Inktense, watercolor or colored pencil paintings... here is a picture of my paintbox:
It's messy, I use a folding table for an "easel" and I tossed a few paintbrushes, pallette knives & one possibility for a color mixing pallete.
I don't know yet what I'm going to paint for subjects, but I'll try different things and go from there...
As far as posting, I'll probably post twice a week...
To see other stuff I've done, check out my regular blog particularly April & May 2012...
Let the madness begin!
Subscribe to:
Posts (Atom)